1
Choose how to sign in
Go to app.wire.mn and choose how to sign in: a one-time code by email, your phone, Google or DAN. If this is your first sign-in, a new account is created automatically.
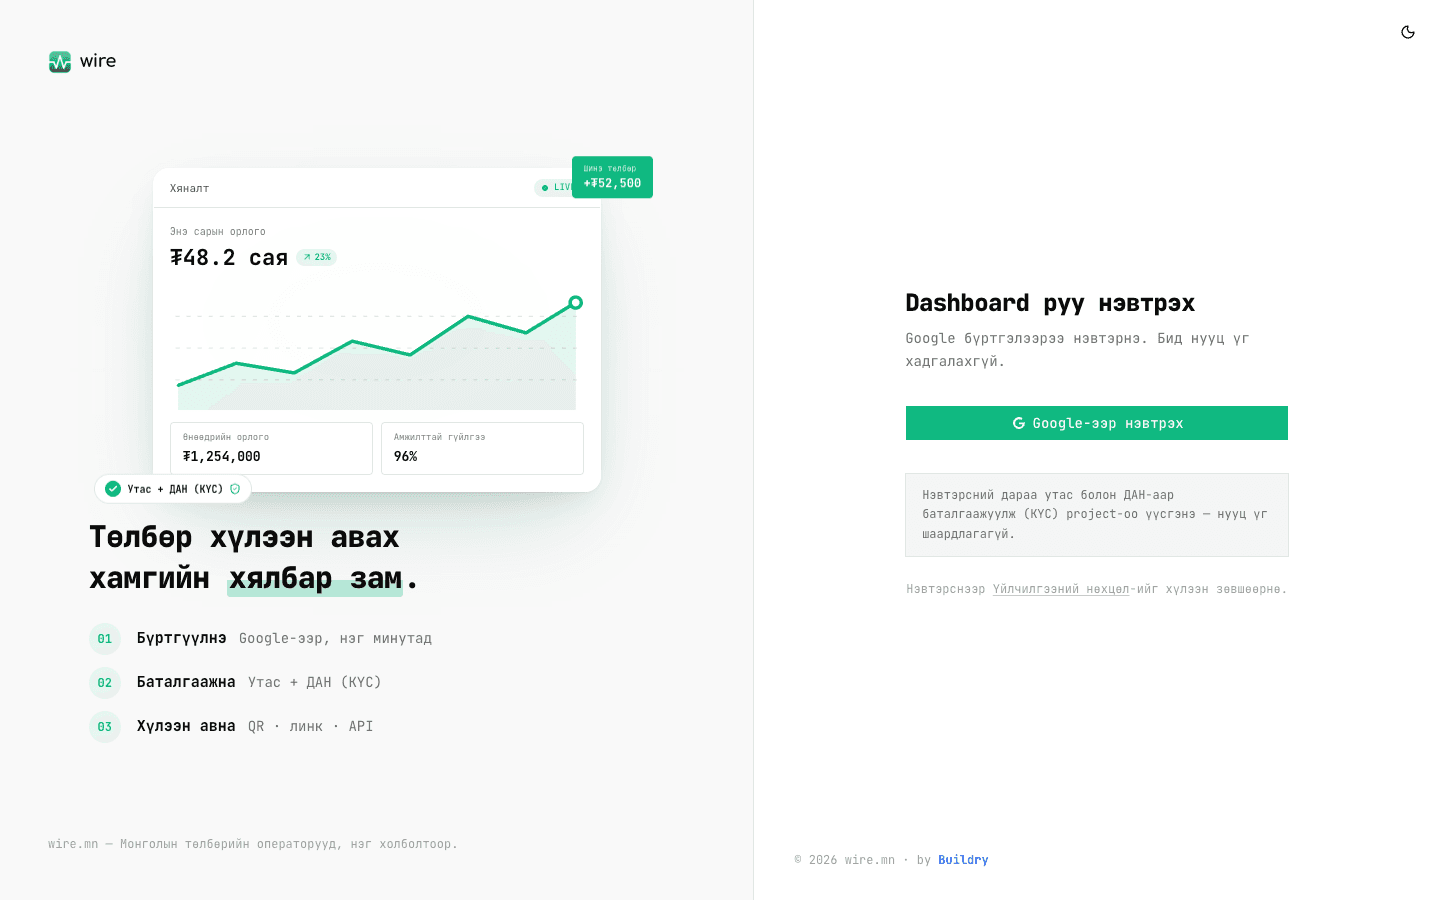
How a new merchant signs up on Wire, completes verification, creates a project and switches on a payment channel — the full sequence, with real screens.
Wire has no separate password — you sign in with an email code, your phone, Google or DAN (state e-ID). Because this is a financial service for taking payments, every owner completes three verifications in this order: email, phone, DAN; the one you signed in with already counts. Each is done once — however many businesses or projects you open, they are not asked again.
Go to app.wire.mn and choose how to sign in: a one-time code by email, your phone, Google or DAN. If this is your first sign-in, a new account is created automatically.
A new user goes straight to the verification page. The first step, email, is confirmed with a 6-digit code — if you signed in by email or Google, it is already done. Then enter your phone number and click Verify.
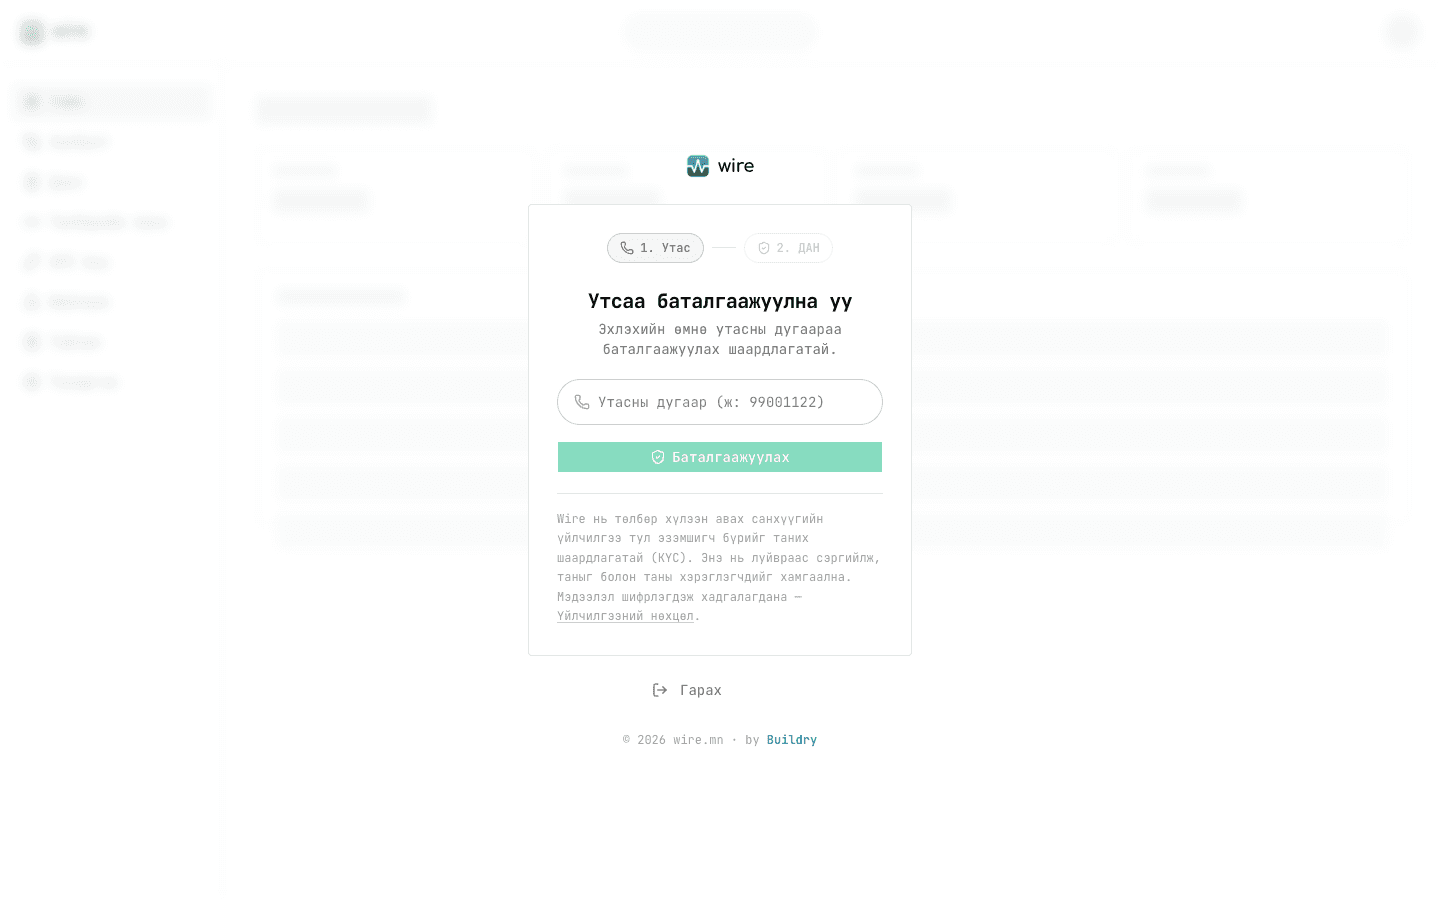
Send the code shown on screen by SMS from your own phone to the short number given — you send it yourself instead of waiting for a message. Once it is sent, the page continues automatically.
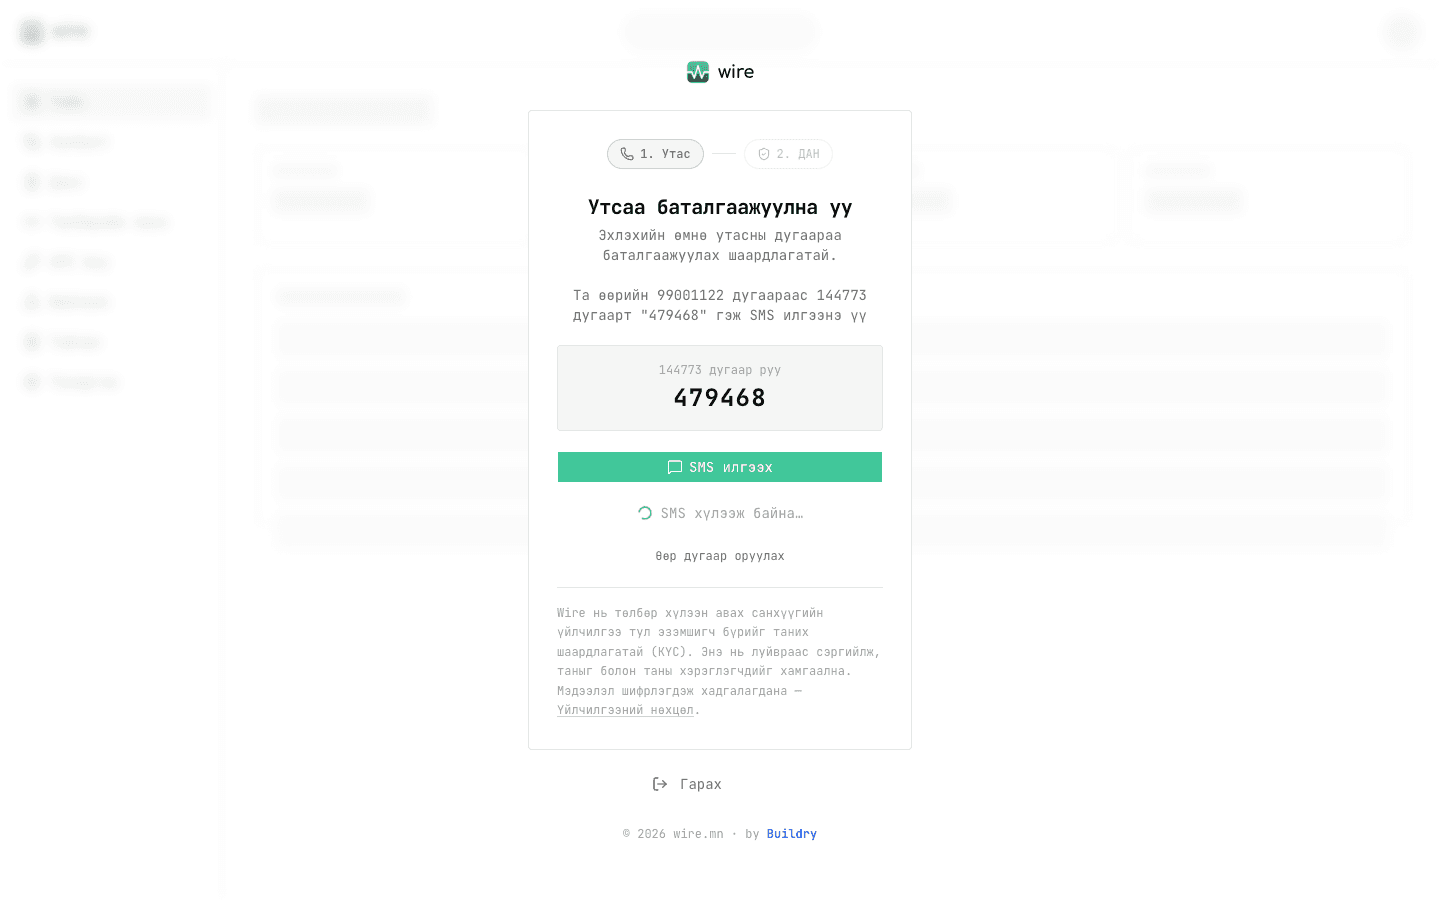
The third step — verify your personal details through the state DAN system. Click Verify with DAN.
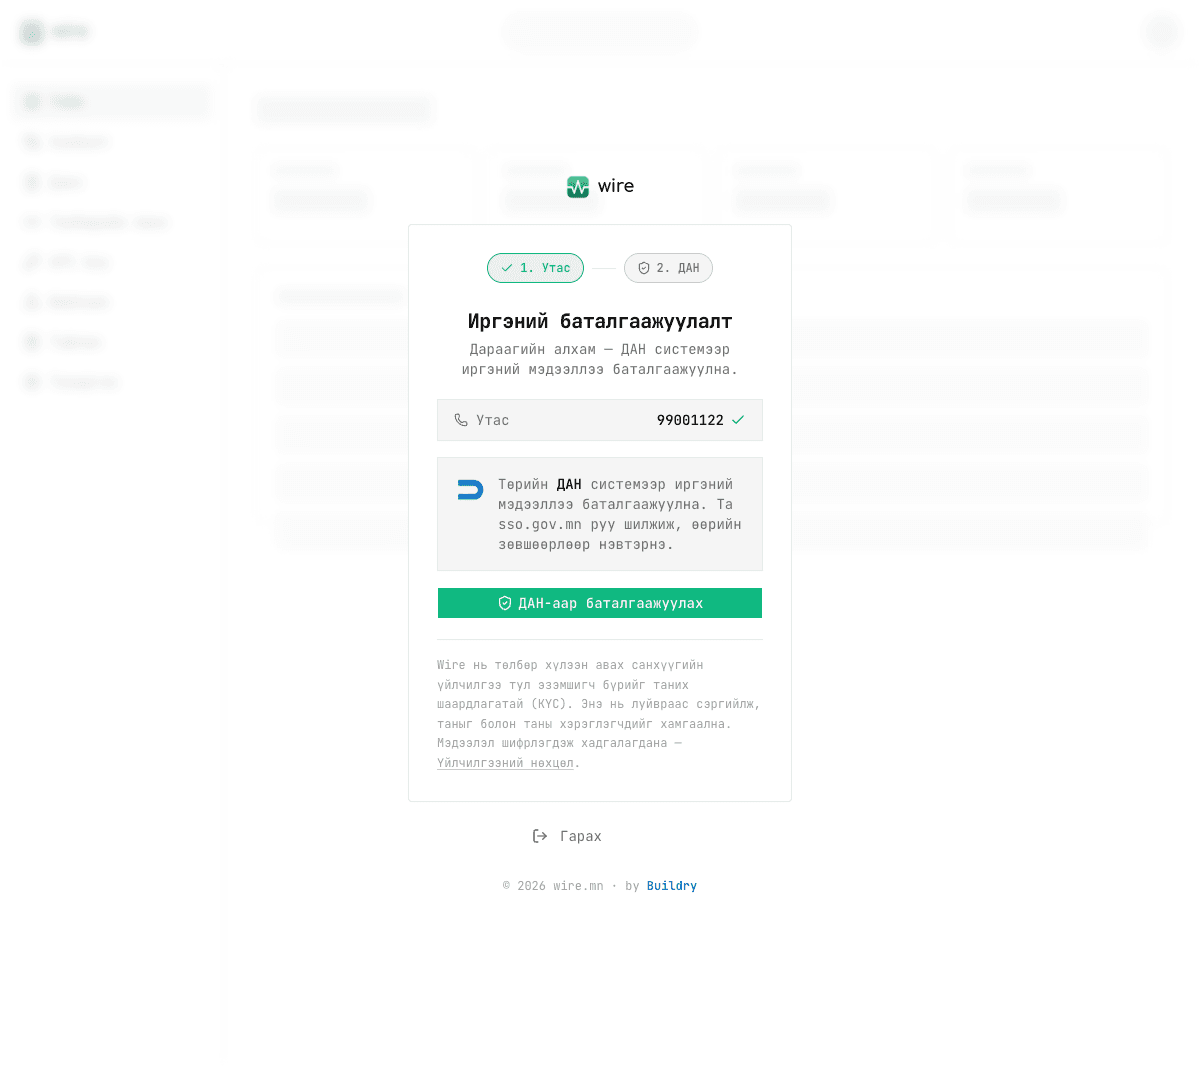
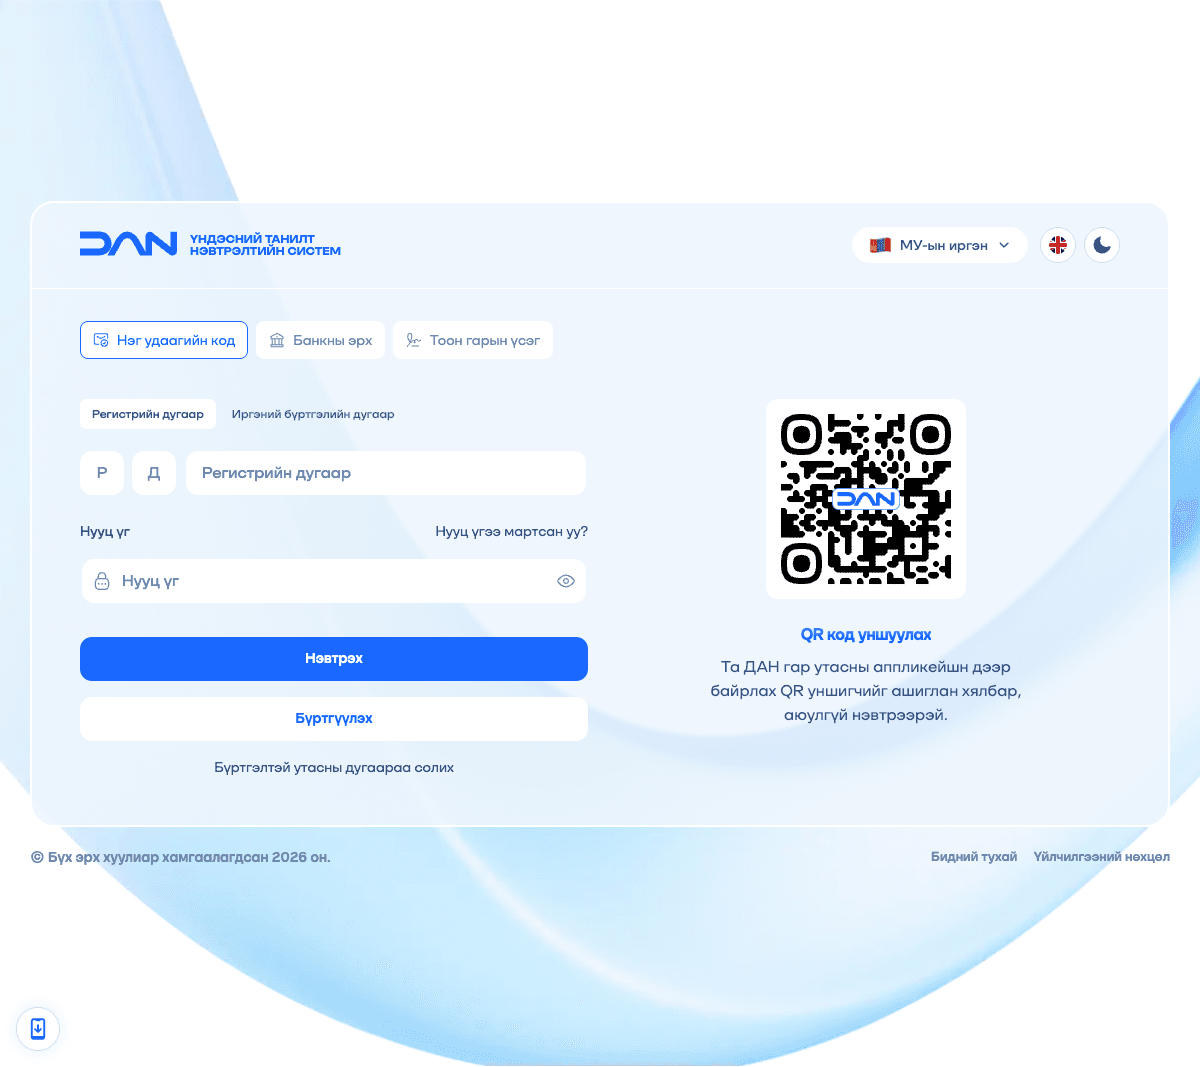
You move to the state single sign-on, sign in with your own DAN account and consent to sharing your details. When it succeeds, you return automatically.
On the profile page, check that email, phone and DAN all show Verified. From here on, every feature is open.
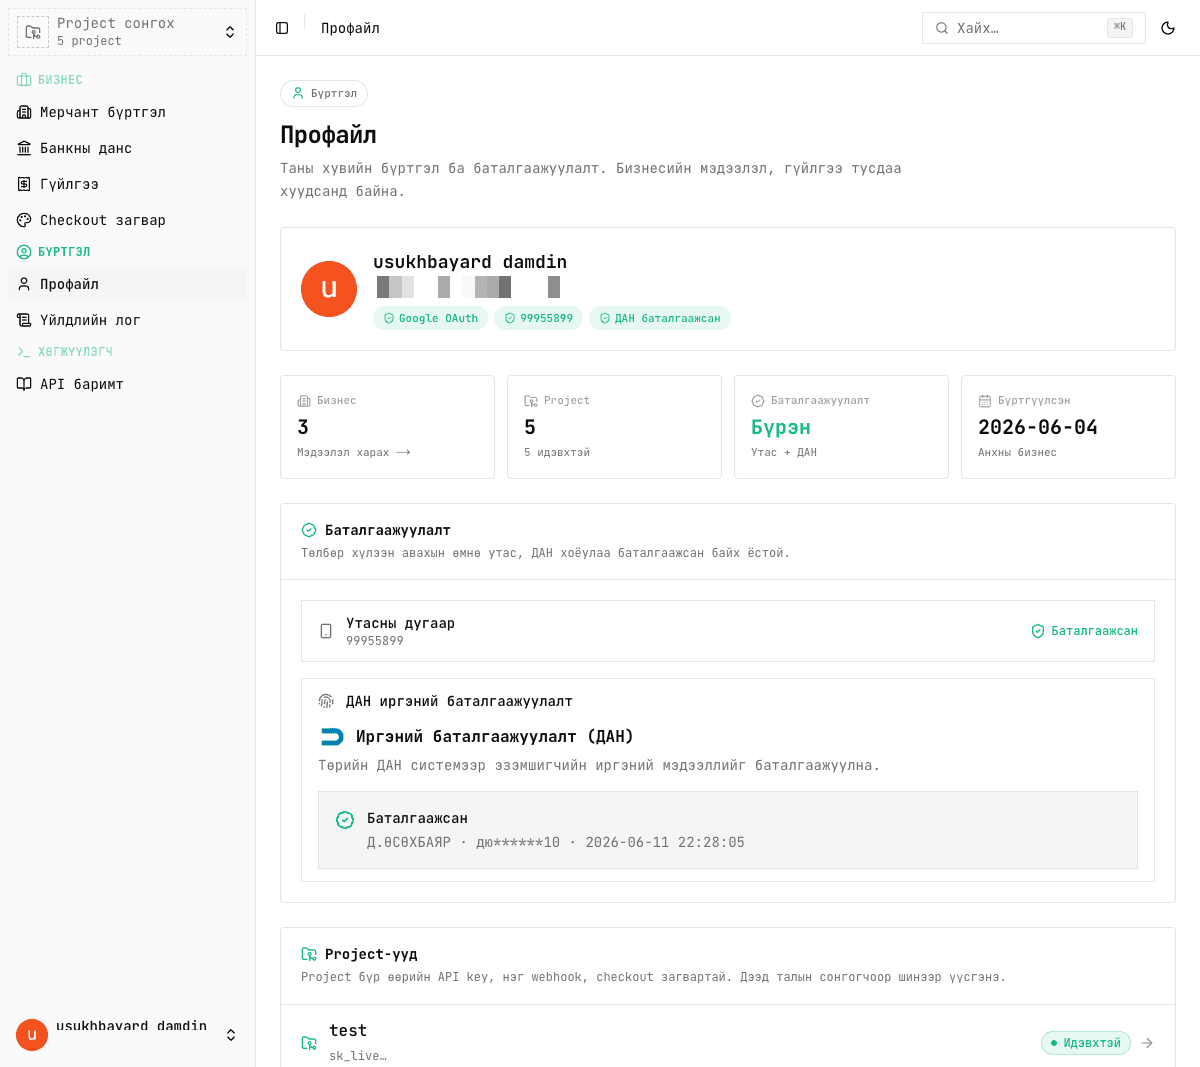
Business = the identity with KYC, bank accounts and operator registrations. Project = the integration environment under it: its own API key, one webhook and a checkout template. One business can have many projects, and one user can open several businesses.
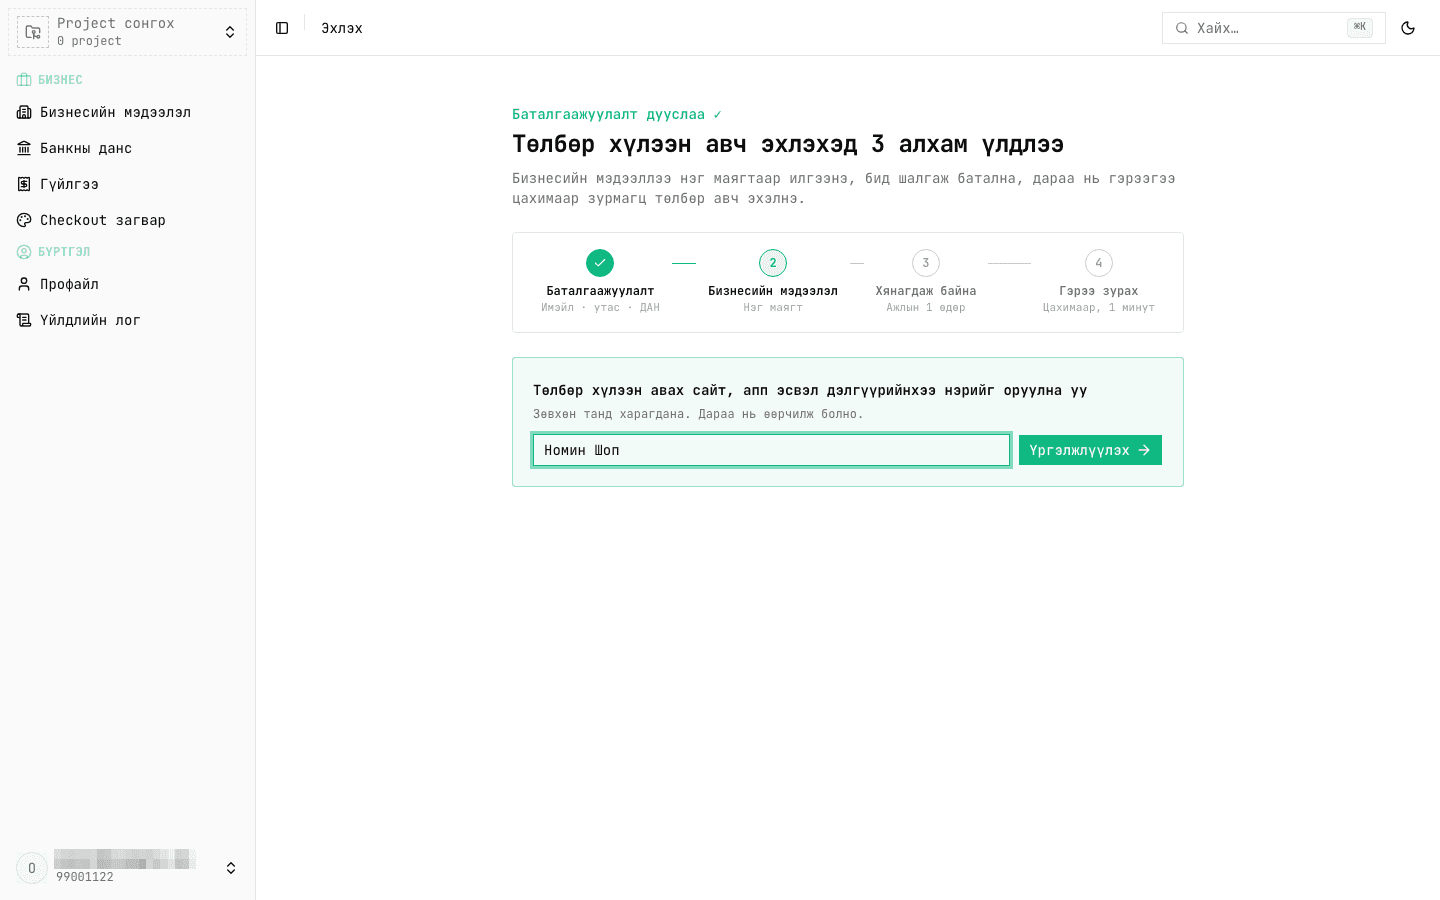
When verification is done, the Get started page opens and shows the four steps to taking payments: verification → business details → review → agreement. Enter the name of the site, app or shop that will accept payments and click Continue — the project and its business are created together, and the business details form opens straight away (step 11).
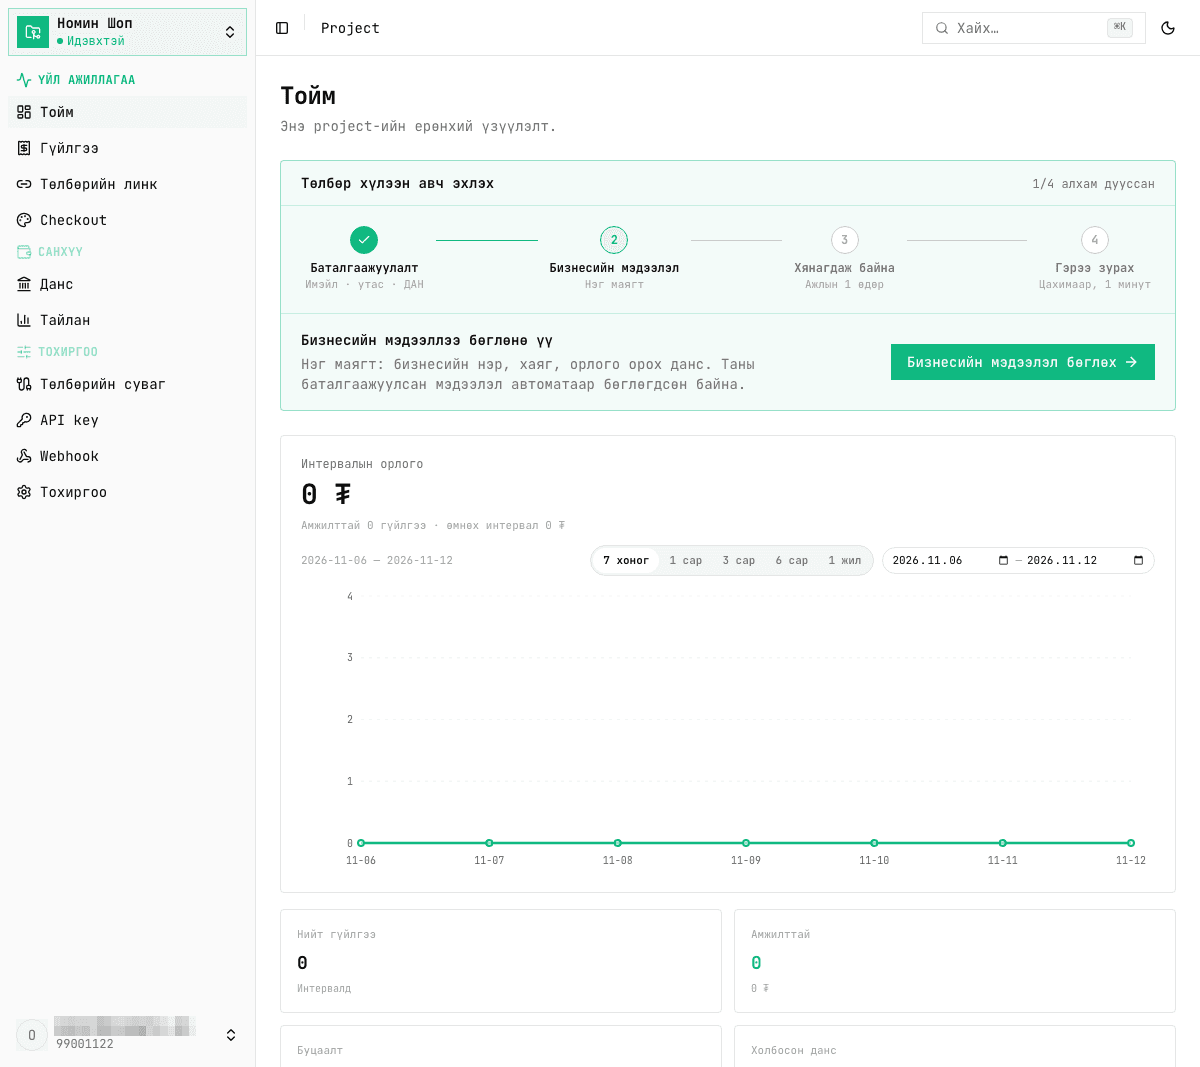
At the top of the Overview, the Start accepting payments card always shows how many steps are done and what comes next — Fill in business details takes you straight to the form. The left menu leads to transactions, payment links, checkout, accounts, reports and settings.
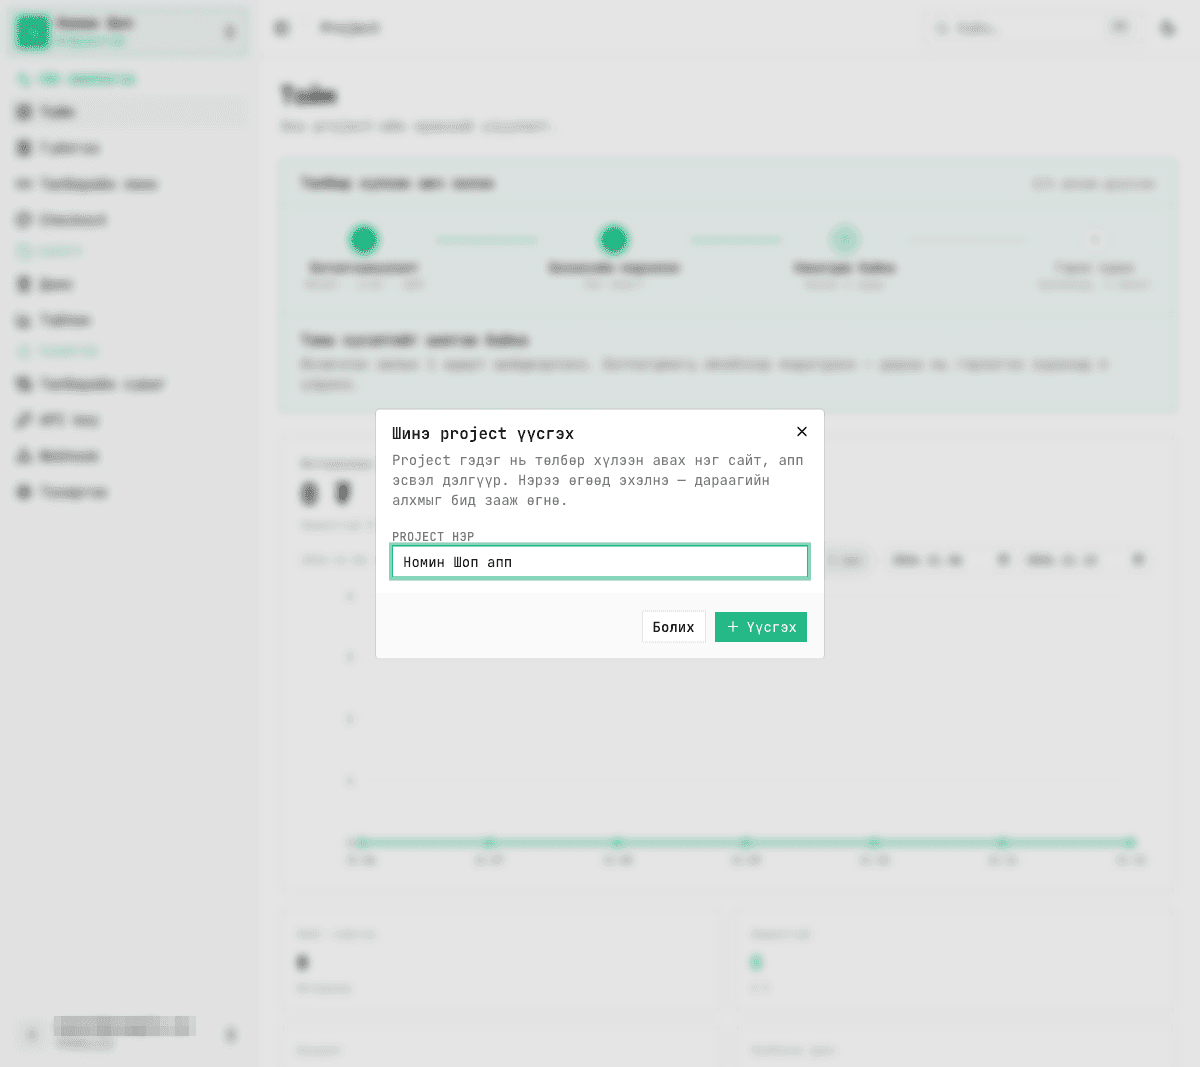
If another site or app needs its own API key and webhook, click Create a new project in the project switcher at the top left and give it a name. The new project is created under your current business, so verification and business details are not asked again.
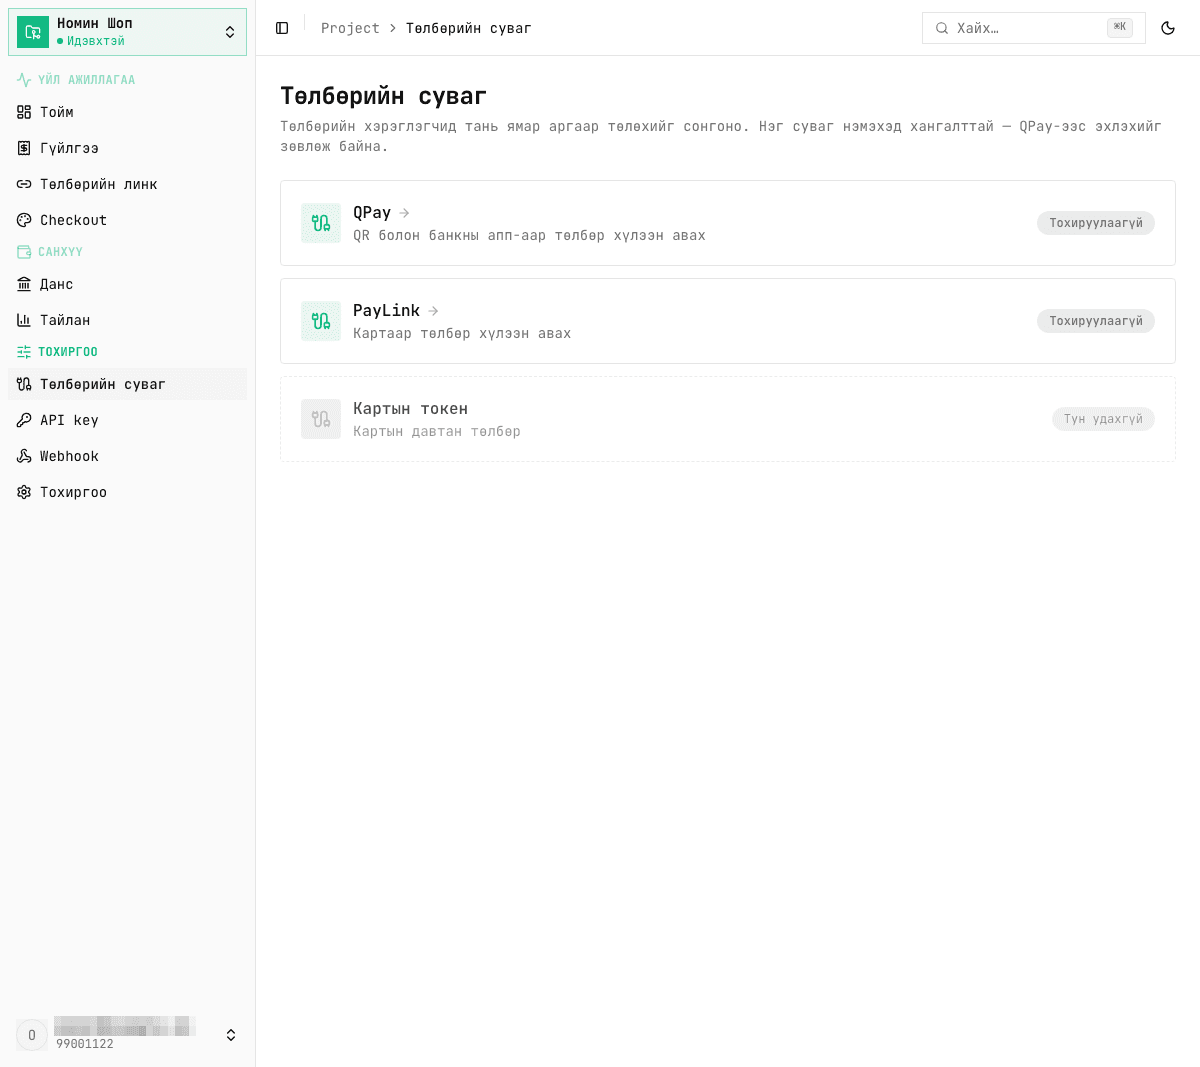
If your business is already connected to a payment channel, a new project's Payment channels page asks one question: keep the current business and turn the channel on with one click, or Register a new business for a different owner or register number (its own details, account and approval).
To take payments, connect at least one payment channel to your business. The flow matches the four steps on your Overview: send your business details → review and approval → sign the agreement electronically → payments go live. The agreement is signed after approval — submitting the application needs no agreement.
Settings → Payment channels. Your first project opens the form directly; to add another channel, choose it from this list. One project can connect several channels, each channel once.
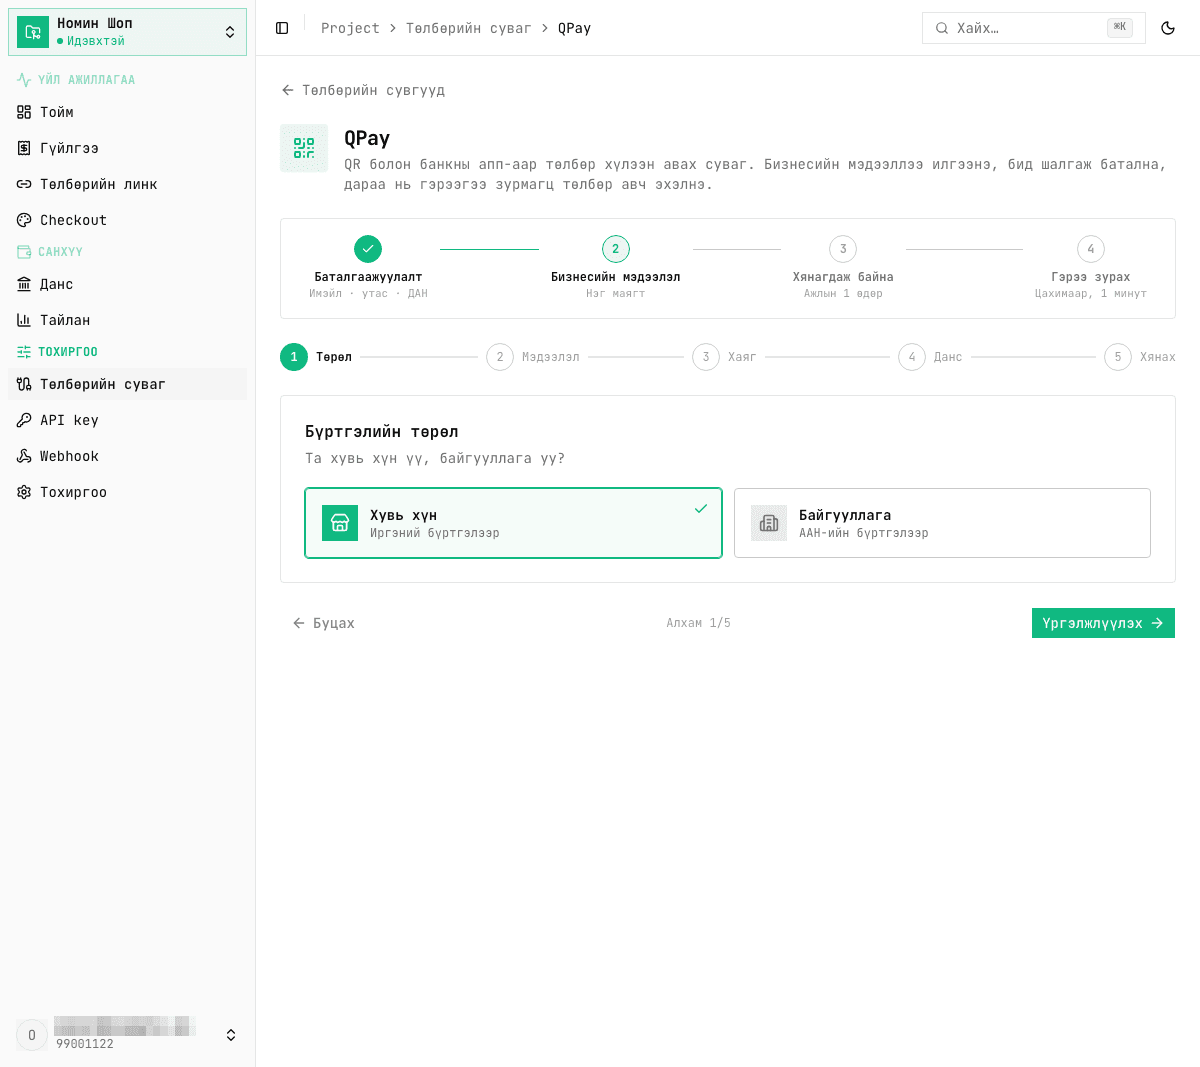
The channel page shows the same four-step path at the top. The form has 5 steps; first choose Individual or Company. If you were already approved on this channel under another business, a Use your existing merchant registration card appears above it — choose it and the project works right away, with no new application and no wait.
Register number, surname and name are filled in automatically from your DAN-verified details (Fill in again refreshes them). Add the business name payers will see and choose your type of business.
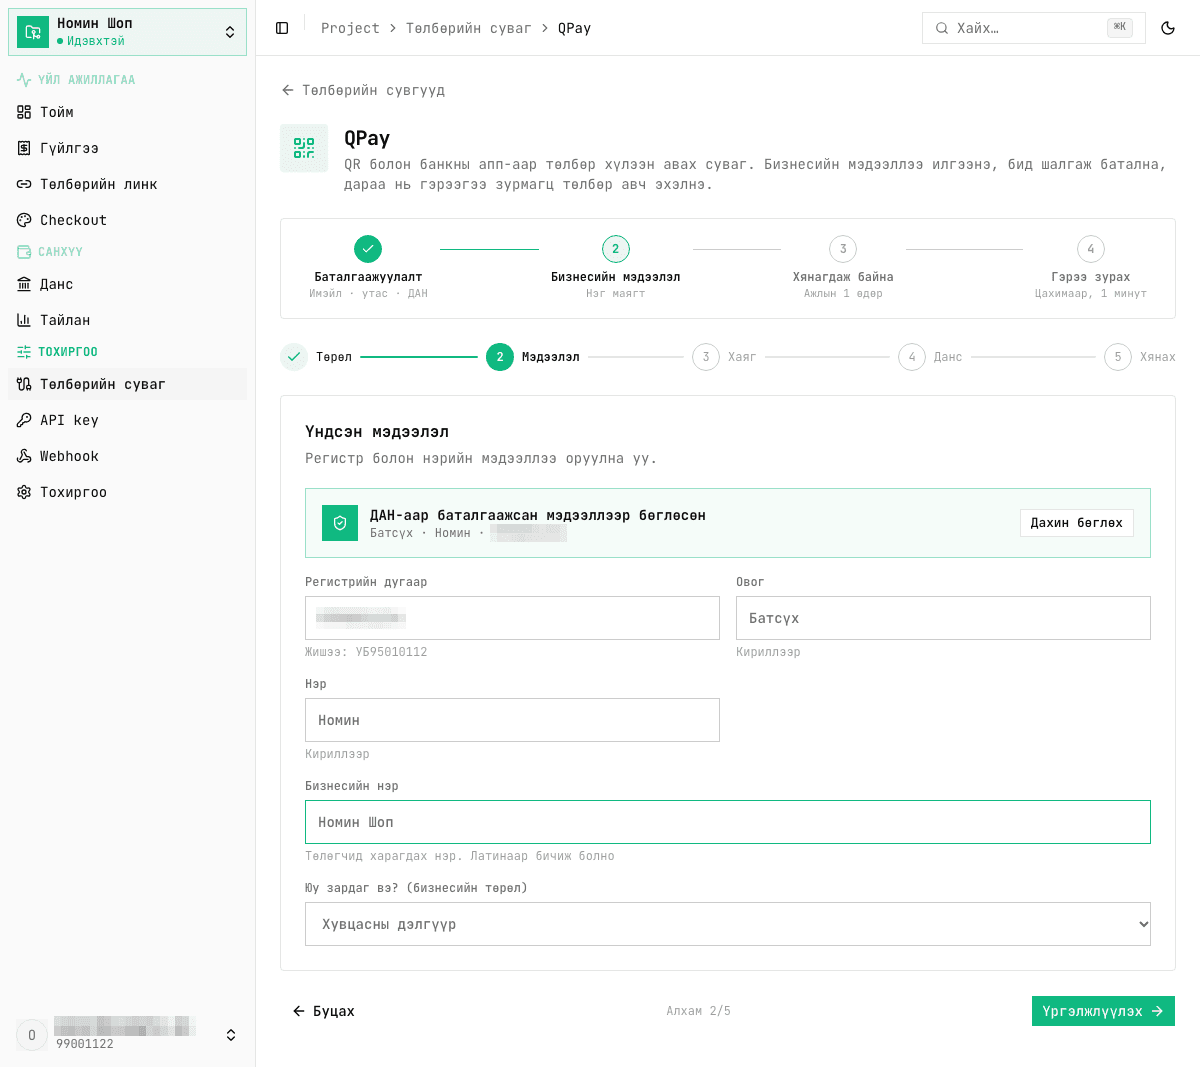
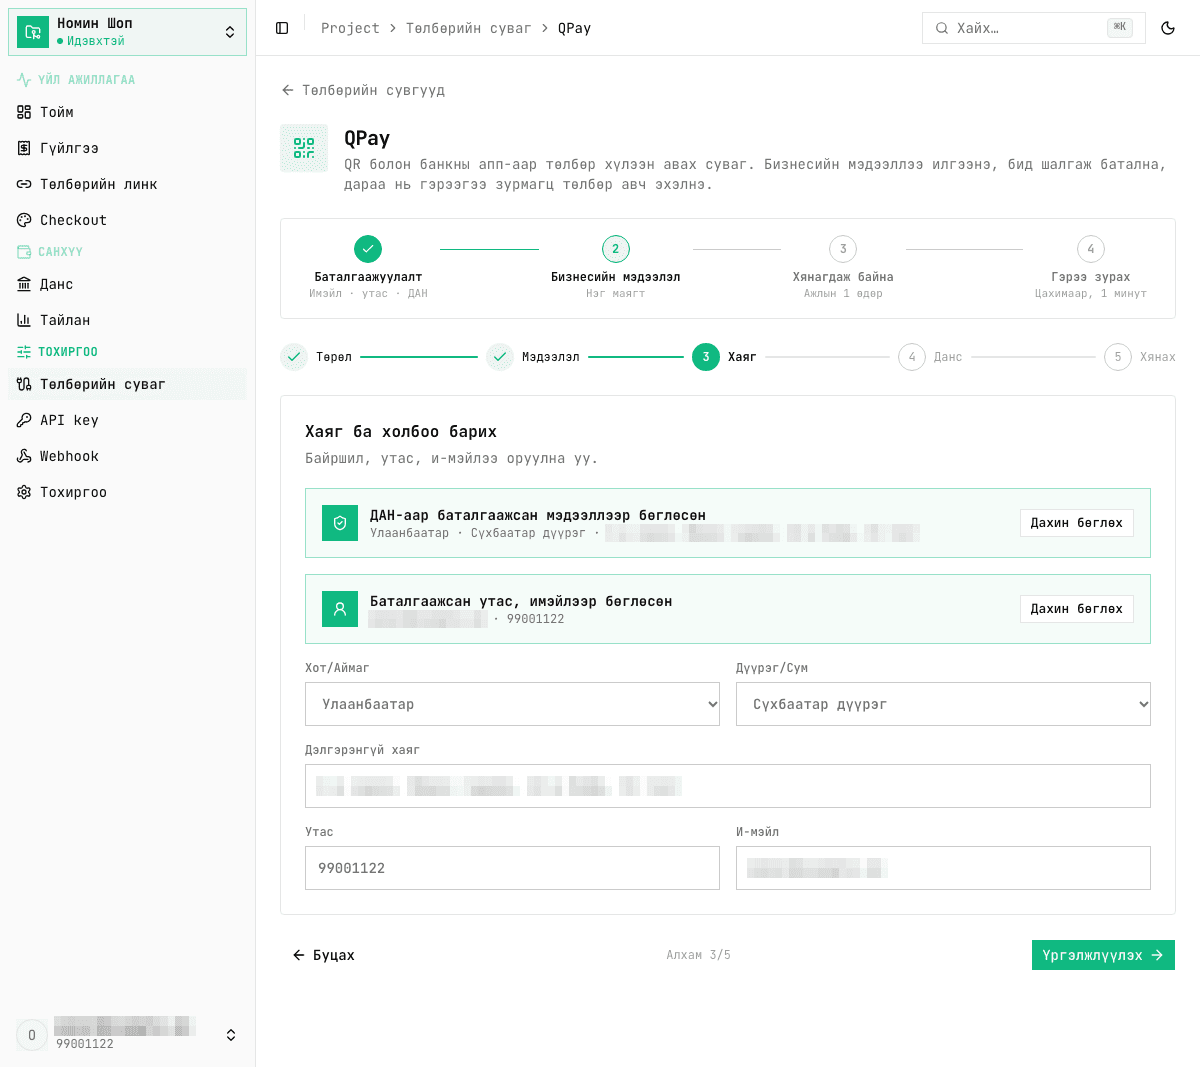
City, district and full address come from DAN; phone and email come from your verified profile. Edit them if needed.
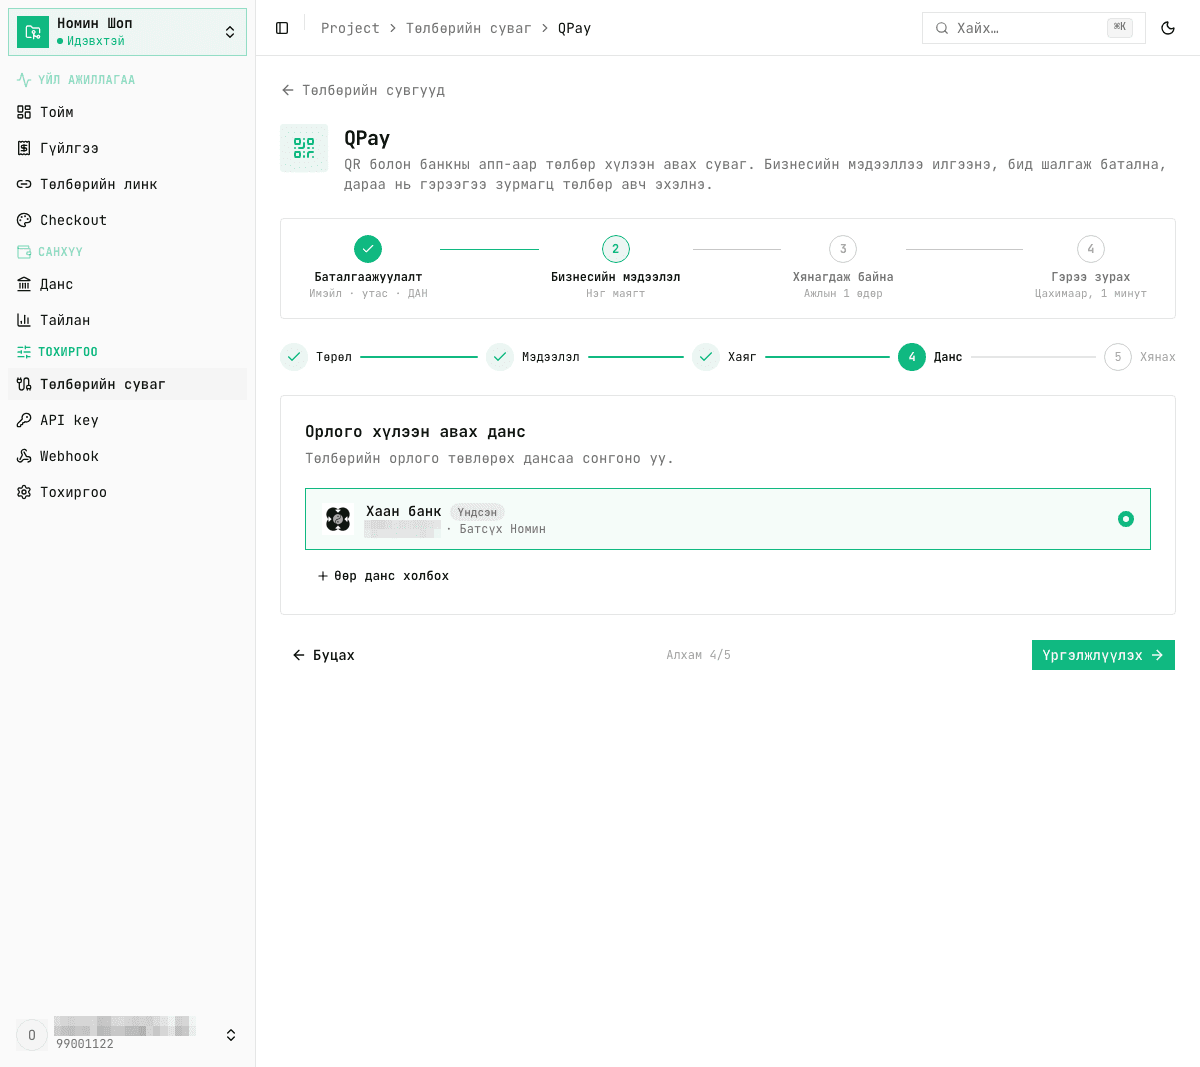
Choose the bank account where your revenue lands. With no account yet, enter the bank, account number and account holder's name and click Link account; add more with Link another account. Enter the account number only — not an IBAN starting with MN.
Check all your details on one screen and click Send application. The form saves itself at every step, so you can leave it half done and continue later.
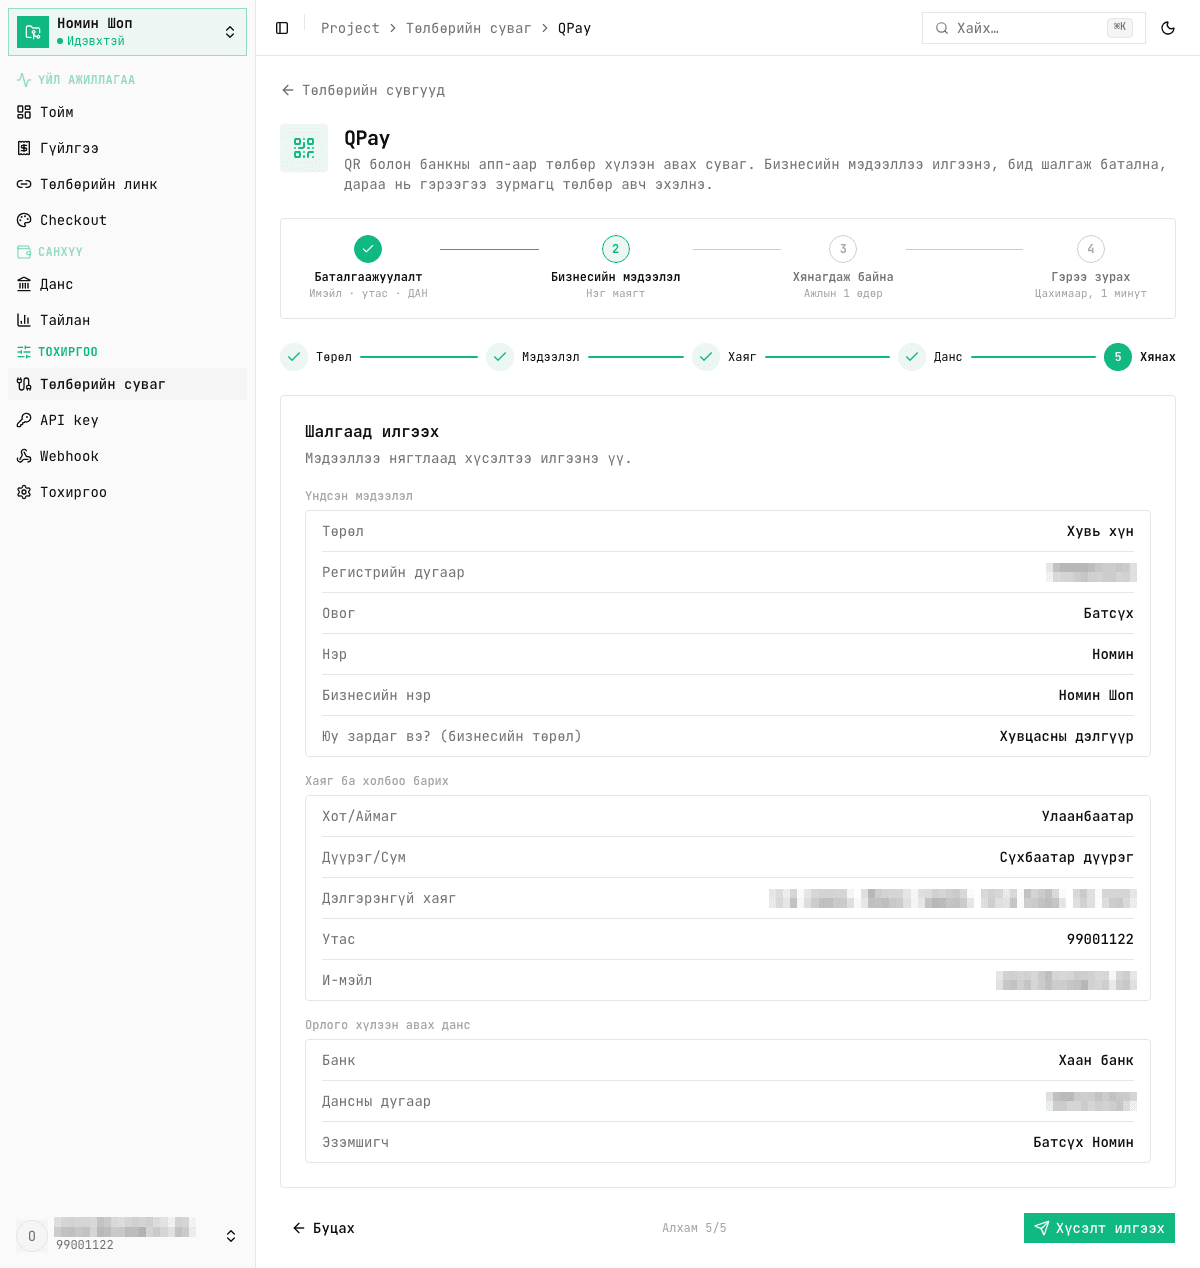
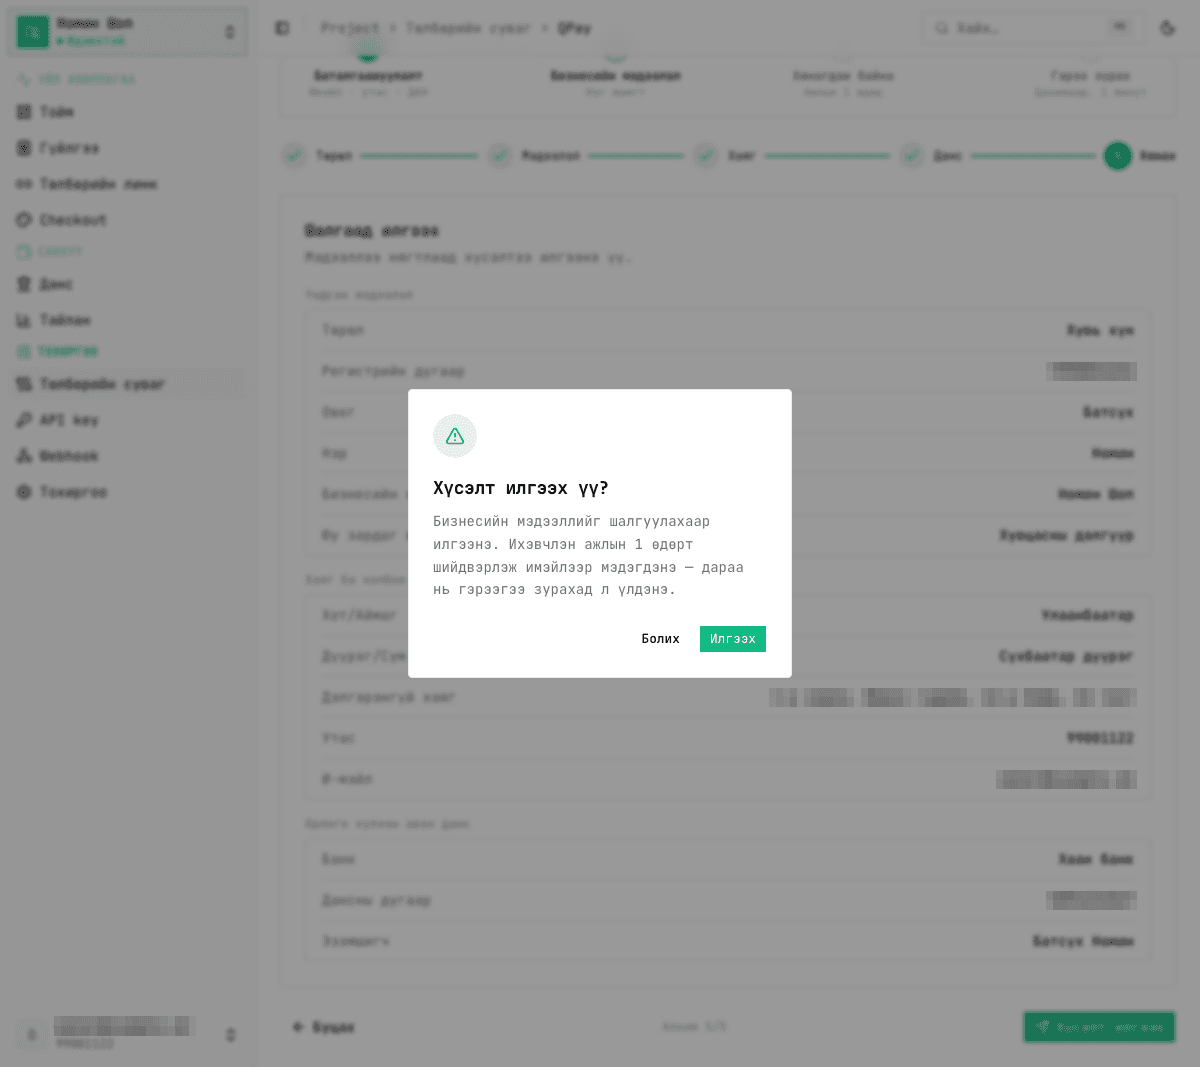
Click Send in the last window and the application goes to review. It is usually decided within 1 business day, and you are told by email.
The application shows Application in review and the path moves to step 3. Once it is approved, you get an email and a section to sign the agreement electronically appears on the channel page — as soon as you sign it, the connection goes live and you start taking payments.
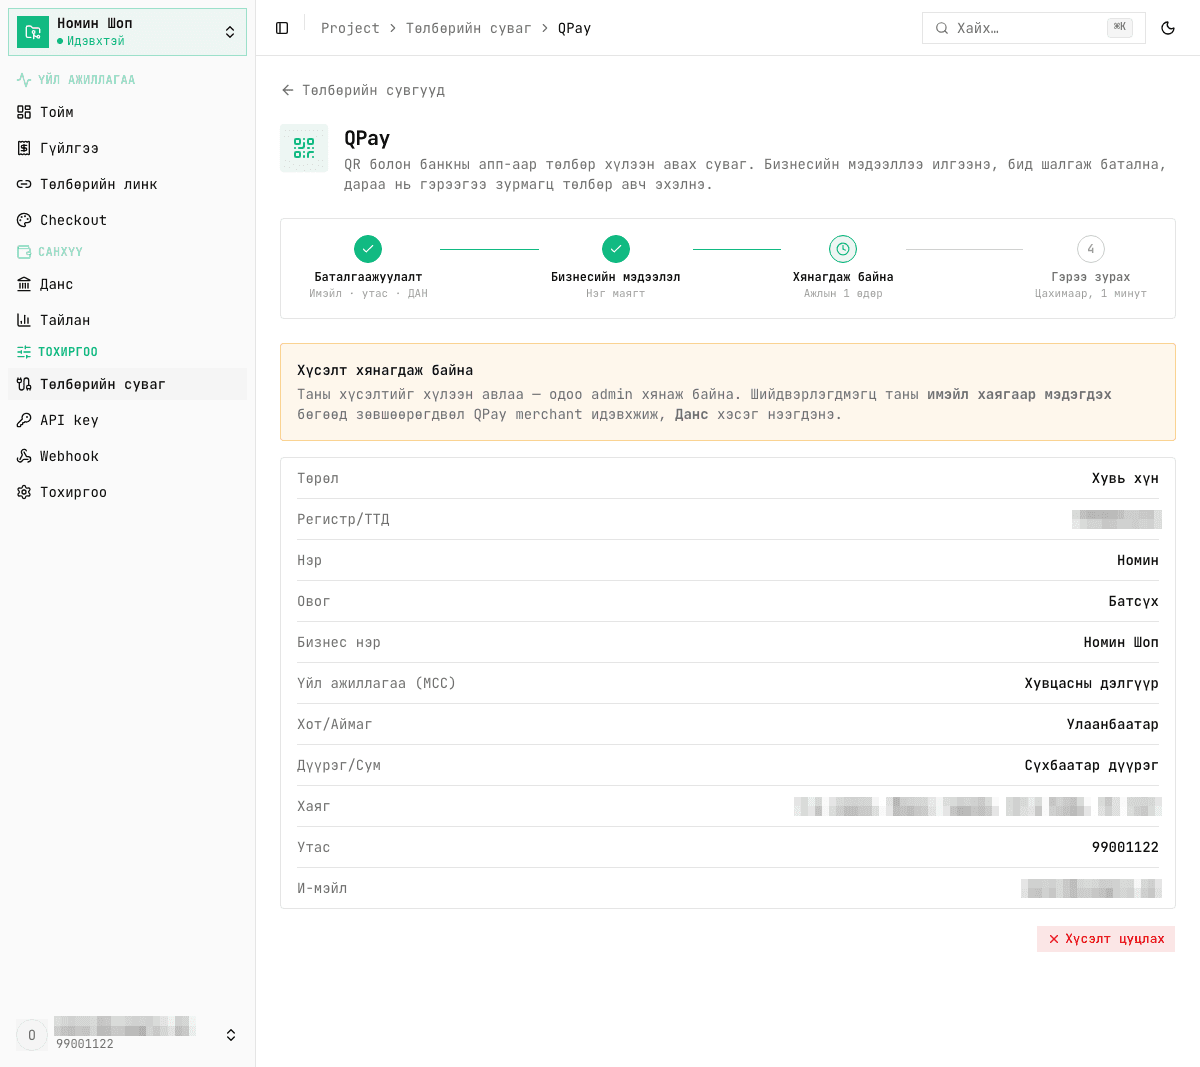
Note: even after approval, the connection stays inactive until you sign the agreement. The most common reason an approved connection does not work is that the agreement step was not done.
Two things a server-side integration needs. You can set up both while your application is in review; once a channel is live you can also start with payment links and checkout right away, without writing code.
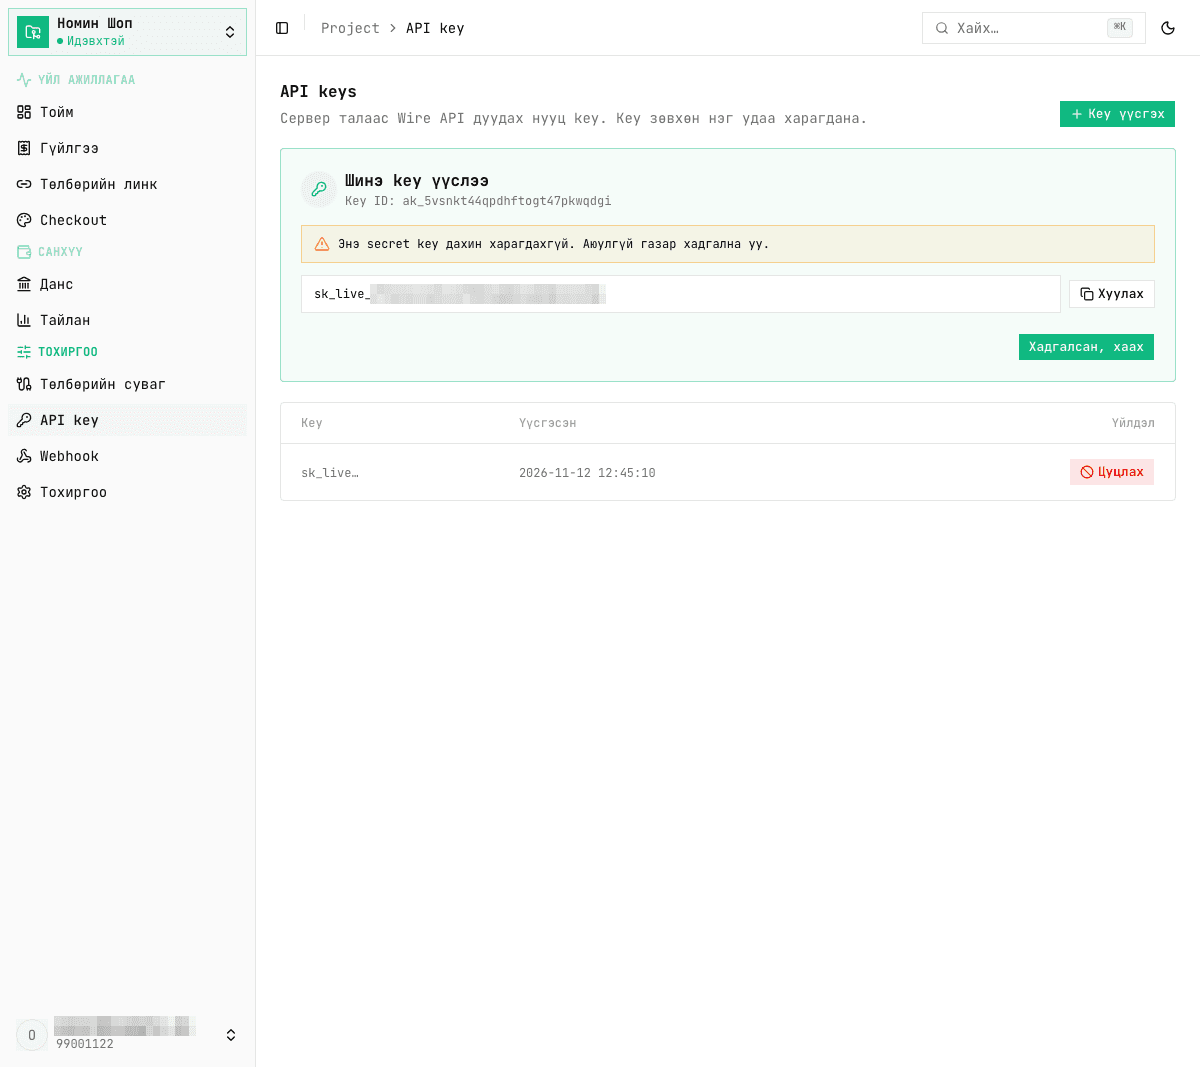
Settings → API key. Click Create key and the sk_live_… secret key is shown only once — save it in a password manager with Copy, then click I've saved it, close. It is never shown again; if you lose it, create a new key and Revoke the old one. Each key reaches only its own project's data.
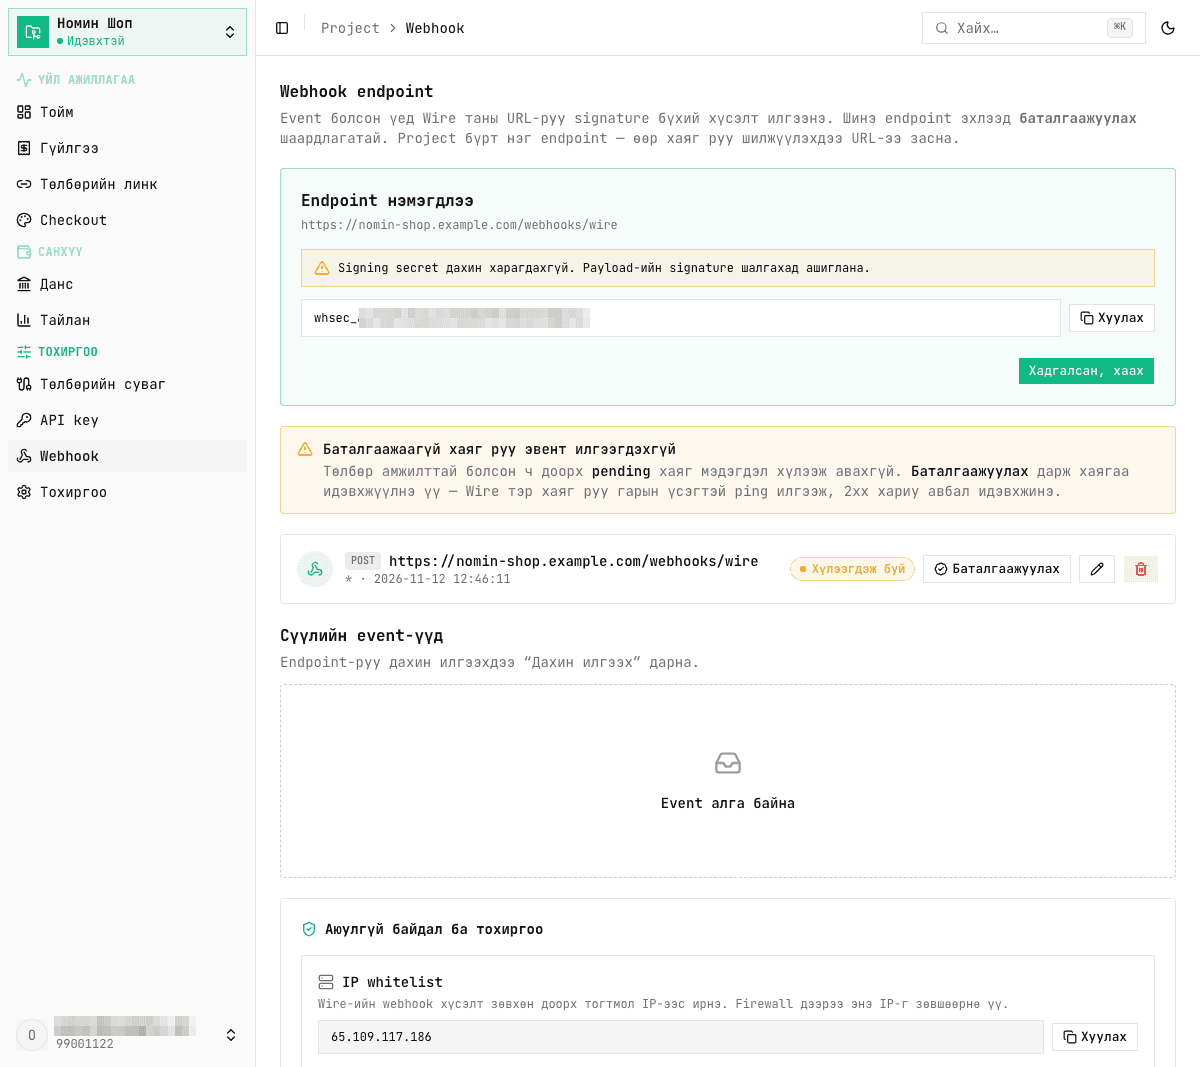
Settings → Webhook. Click Add endpoint and register the URL of the server that receives payment events — its signing secret is shown only once. Then click Verify to verify it: events are not sent to an unverified URL. Each project has exactly one webhook endpoint; when you change the URL, events keep going to the old address until the new one is verified. Full API reference — docs.wire.mn.

Sign-up is free. Connect your account and start taking payments — a fee only on successful transactions.